Mini Pumpkins Art, Trust Me You CAN Make This!
- thepeachbasketandc
- Aug 23, 2024
- 2 min read
Updated: Oct 24, 2024
Who else is head over heels for Autumn, but their wallet is crying for help with the decorations? Same here!

Get ready to meet the pumpkin Picasso, Kayla from Fabulous Flips! She's got you covered with a foolproof guide to crafting the cutest pumpkin art imaginable! And guess what? She's gone the extra mile and whipped up a "DIY Spackle Art Kit" that's basically a creativity treasure chest. Who knew DIY could be this much fun and this hassle-free? Kayla did!
Mini Pumpkins
Step 1: (optional) paint your background and let it dry
Step 2: outline your pumpkins - make them smaller than you want your actual pumpkins to be and they don’t have to be perfect drawings
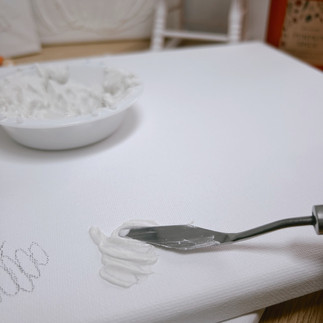
Step 3: Pick a rounded but pointy palette knife and mix up your texture art mix, then start to apply over your outline. I like to turn the canvas upside down and start from the bottom to the top, then turn it back around to round out the top edges, and then turn it upside down one more time to smooth it all together. Then I add my stem and blend it all together.
Step 4: Repeat for every outline until you have them all completed!
Step 5: Let dry for about 24 hours, then go over with a paintbrush and some texture mix to fill in any cracks, the texture mix does shrink so cracks are normal. Then let dry for another 12-24 hours and it is ready to go!
*If you want colored pumpkins, you can either paint them after or add your paint to the texture art mix (which I find to be easier)
Big Pumpkin
Step 1 (optional): paint your background and let it dry
Step 2: outline your pumpkin - make it a little smaller than you may want to make it to allow for adjustments in the shape to be made as you go.
Step 3: Pick a palette knife (rounded not quite as pointy and larger and first go around the outline of the pumpkin and smooth out the middle. Then starting with the left side go sideways down the pumpkin to create ridges, keep your palette knife angled so it just leaves the one crease, then continue making them until you get to the middle. At which point start on the right side and work your way back to the middle. Touch up the bottom of the pumpkin, and smooth out any issues by going back over your ridges. Last add a stem at the top!
Step 4: Let dry for about 24 hours, then go over with a paintbrush and some texture mix to fill in any cracks, the texture mix does shrink so cracks are normal. Then let dry for another 12-24 hours and it is ready to go!
*If you want a coloured pumpkin, you can either paint it after you are done or add your paint to the texture art mix (which I find to be easier)
Are you looking for other unique gifts or activities for the fall season? Be sure to shop our store to find the perfect fall items!


Comments